How to Plan a Portrait Photography Session Location
Table of Contents — 7 min read
- Scouting the Home Before You Shoot
- Camera Settings for Indoor Window Light: How Technique in Practice
- The Best Spots in a Typical Home
- Directing Subjects in a Home Environment
- Managing Mixed Light Sources
- Planning a [Golden Hour](/learn/portrait-session-directing/golden-hour-portrait-photography-tips/) Home Session
- Common At Home Portrait Session Mistakes
How to Plan a Portrait Photography Session Location
This guide is part of our Portrait Session pillar and the Portrait Session Planning & Prep collection. Related topics include outdoor portrait location scouting tips guide, best locations for outdoor portrait photography, portrait session shot list template download. For additional reference, see Digital Photography Review. Mastering how to plan a portrait photography session location is one of the highest-leverage skills you can develop as a photographer. Whether you’re shooting portraits, landscapes, or everyday moments, understanding how technique transforms how you approach every frame. Inside our Shut Your Aperture School, we teach exactly this — from first principles to advanced application. In this guide, you’ll get the full picture: what how to plan a portrait photography session location actually means in practice, how to dial in the right settings, and how to apply these techniques immediately in your own work.
 Save
SaveScouting the Home Before You Shoot
The first 15 minutes of any home session should be a walk-through. You’re looking for three things: light sources, background depth, and uncluttered surfaces.
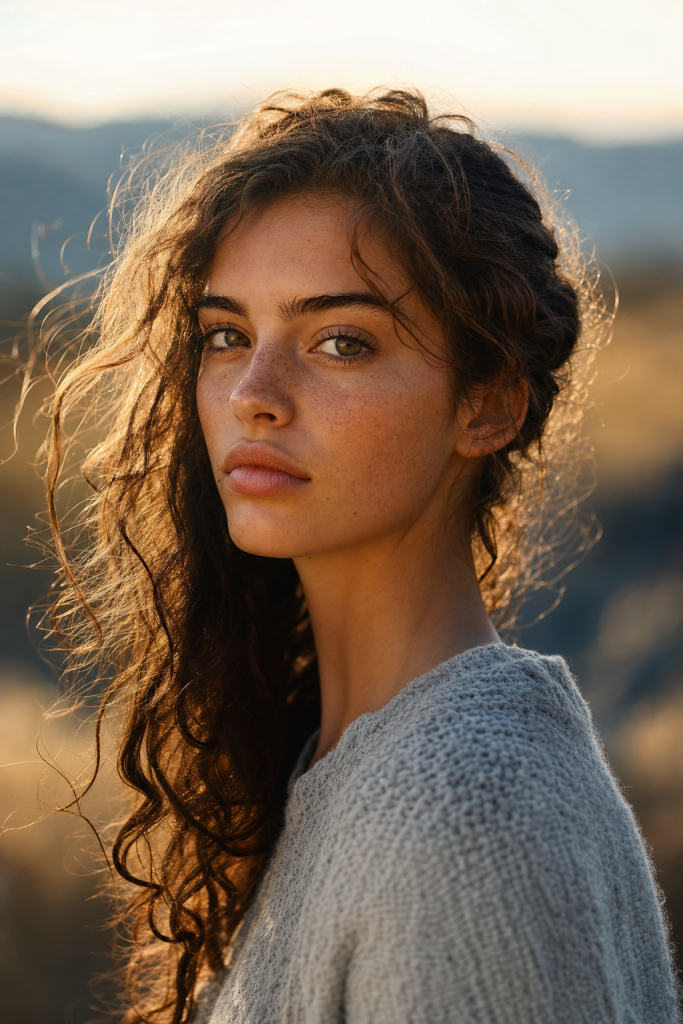
Light sources — note every window in the home and what direction it faces. North-facing windows give soft, consistent, neutral light throughout the day. South-facing windows in the northern hemisphere get direct sun for most of the day, which is harsh but usable early morning or late afternoon. East windows are best in the morning; west windows come alive in the 2–3 hours before sunset.
Identify any windows large enough to use as a primary key light. Floor-to-ceiling or wide picture windows are ideal. A small bathroom window can work for tight headshots but won’t light a full-body shot.
Background depth — look for rooms where the subject can be at least 6 feet from the background. A subject tight against a wall has nowhere for the light to fall off, and the background competes with the face. In a living room, position the subject 6–10 feet from the back wall and the wall goes naturally soft at even moderate apertures.
Clutter — you don’t need a sterile space, but random clutter is distracting. Brief the client in advance: tidy the areas you might use, put everyday items away, and clear any surfaces that will be in-frame. A laptop open on a table, a pile of mail, a visible TV remote — these all pull attention in the final image.
Level Up with Shut Your Aperture School
Run smoother sessions and get more from every client — join Shut Your Aperture School
- $29/month
- 1,200+ students
- 4.9/5 rating
- 30-day money-back guarantee
Camera Settings for Indoor Window Light: How Technique in Practice
Window light for portraits follows the same exposure logic as any soft light source — the distance from the subject to the window determines how quickly the light falls off.
| Setting | Strong window light | Soft/overcast window |
|---|---|---|
| Aperture | f/1.8 – f/2.8 | f/1.8 – f/2.8 |
| Shutter speed | 1/250s – 1/500s | 1/100s – 1/250s |
| ISO | 100 – 400 | 400 – 1600 |
| White balance | 5500–6500K (daylight) | 6000–7000K (overcast) |
| Focus mode | Single AF, face detect | Single AF, face detect |
Use a reflector. A simple white foam core (about $4 at any craft store) placed on the shadow side of the face fills in the shadow without creating a second light source. Position it 2–3 feet from the subject, angle it until you can see the catchlights in the eyes from the reflector side. This is often the only additional gear you need for a clean window-lit portrait.
Keep shutter speed above 1/100s to avoid camera shake and any subject motion blur, even when light is low. Push ISO before you let shutter speed drop below that threshold.
One-Click Lightroom Presets
Deliver stunning portraits to clients faster with our professional Lightroom presets
- One-click editing
- Works in Lightroom mobile + desktop
- Lifetime updates
The Best Spots in a Typical Home
Not every room works equally well. Here’s where to look and what makes each spot useful.
Kitchen near a window — works well for lifestyle and environmental portrait photography because kitchens tell a story about the person. Cooking, reading, making coffee — these interactions are natural. The tile or wood floors also reflect light upward, which fills in shadows under the eyes.
Bedroom window — often the most controllable light in the home because bedrooms usually have curtain panels. Diffuse direct sun with a sheer curtain, use a blackout curtain to block ambient from other windows if needed. Good for intimate, relaxed portraits.
Staircase — stairs create natural leading lines, offer multiple heights to work with, and are one of the few places in a home where you can get elevation above your subject. Shoot from above looking down a staircase at a subject looking up — it’s a strong composition rarely seen in typical home sessions.
Doorways and hallways — the narrow space creates a natural frame around the subject, and the depth of a hallway behind the subject gives separation. A doorframe makes an excellent portrait frame when shooting from outside the room looking in.
Outdoors at the doorstep or porch — don’t overlook the exterior of the home. An open front door with the subject leaning in the doorway or sitting on porch steps gives you better light control (open shade is excellent) while still being part of the home story.
 Save
SaveDirecting Subjects in a Home Environment
The home session advantage is authenticity — use it. Generic “stand here and look at me” posing wastes the setting. Instead, give the subject something to do.
Activity-based prompts:
– “Make yourself a coffee like you normally would. I’ll be right here.”
– “Sit the way you actually sit when you’re reading.”
– “Walk toward the window like you’re going to look outside.”
These prompts produce natural expressions and body language that posed directions rarely achieve. The technical challenge is that subjects in motion require faster shutter speeds and precise focus tracking. Use face detection or eye tracking AF if your camera has it.
For headshot sessions at home, activity-based prompts work less well because the framing is tight and movement matters less. For headshots, use a conversational approach — ask questions, react genuinely to answers, and take the shot during the natural expression between posed looks.
Managing Mixed Light Sources
The biggest technical problem in home portrait sessions is mixed light. Standard household LED bulbs or tungsten bulbs are around 2700–3000K. Daylight coming through a window is 5500–6500K. The two sources photograph as dramatically different colors — one area goes warm orange, the other goes cool blue.
The fix: eliminate the competing source. Turn off all overhead lights and room lamps in the shooting space. Use only the window as your light source. If the room is too dark without the artificial lights, that’s a signal to push ISO rather than reintroduce mixed light.
If you cannot control the light (a client’s home where overhead lights are on motion sensors, for example), shoot on the side of the subject closest to the window and use the artificial light as a weak fill. Set white balance to 5500K and accept that the shadow side will be slightly warm — that’s often more flattering than cold.
Planning a Golden Hour Home Session
A west-facing window in the 45 minutes before sunset produces remarkable warm light. It’s directional, soft (because the sun is low on the horizon), and flattering in a way that mid-day window light simply isn’t. If a client’s home has west-facing windows and you can schedule an evening session, do it.
The challenge: golden hour window light lasts 15–25 minutes before it changes dramatically. Pre-set your camera, pre-select your locations within the home, and be ready to shoot immediately as the light hits. Don’t spend this window adjusting settings.
After the sun drops and you lose the golden light, transition to a more controlled window setup or wrap the exterior shoot. Don’t try to extend a golden hour session by pushing ISO in flat post-sunset light — the quality drop is significant.
 Save
SaveCommon At Home Portrait Session Mistakes
Over-styling the space. A few editorial props are fine; turning someone’s living room into a set looks fake. Leave the life in the space.
Ignoring the floor. Floors appear in wide shots, especially with children or pets in the frame. Hardwood and tile floors are usually photogenic. Wall-to-wall carpet with a bold pattern or visible stains is a problem — either find a room with better flooring or frame tighter.
Fighting low ceilings with strobes. If ceiling height is under 9 feet, a large softbox bounced off the ceiling produces unwanted hotspots. Stick to window light or a single speedlight bounced off a white wall if you must add artificial light.
Not communicating prep to the client. Send a prep email a few days before: which rooms to tidy, what to wear (no bold patterns, consider solid neutrals), and what time to expect you. An unprepared home wastes the first 30 minutes of a session.
Home sessions produce some of the most personal, resonant portrait work possible. The space gives context that a studio backdrop never can. Nail the light, reduce the clutter, and give your subject something real to do — the rest takes care of itself.
For a complete system for directing portrait subjects and planning sessions of all types, visit the Portrait Session Directing guide at Shut Your Aperture.
Related reading:
– Environmental Portrait Photography: Telling the Whole Story
– Golden Hour Portrait Photography Tips
– Headshot Photography Tips for Better Results
– Portrait Session Directing Hub
Skylum’s Aperty is purpose-built for portrait retouching with AI skin, eye and detail enhancement. Luminar Neo’s Portrait AI complements it for full-body and editorial work. Tagged as affiliate per FTC.
Related deep dive: Sports Photographer of the Year shortlist.
Related deep dive: artistic nude photography techniques.
Related deep dive: how to avoid the unnatural look in AI portrait retouching.