

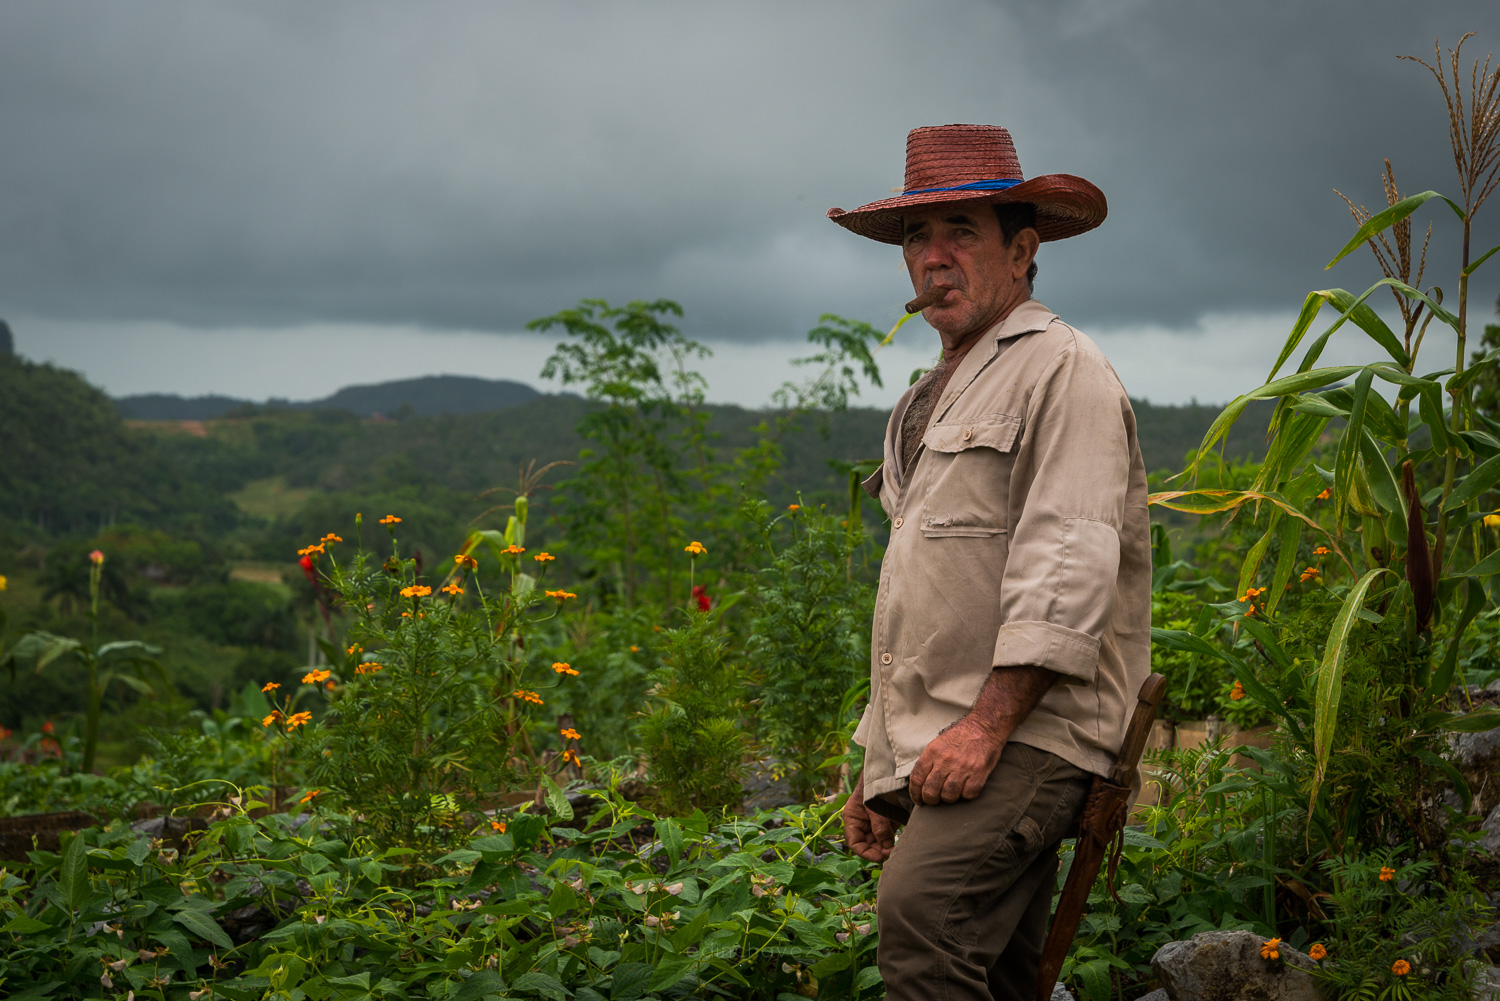
Anyone who is familiar with the world of photography has at least heard of the ubiquitous rule of thirds. This is probably one of the most commonly used guideline for photography. It’s the first rule you learn about when you start capturing images. Whether it’s a portrait or a landscape, the rule of thirds works regardless.
So, if you’re looking to capture stunning images that give off a professional vibe, you need to master the rule of thirds. However, before you do that, it is important to learn what the rule is and how it works.
What is the Rule of Thirds?
The human eye is a complex organ. It works in mysterious ways, like being drawn to certain focal points on an image when they look at it. The rule of thirds plays with this natural tendency of the human eye to be attracted to these particular points on an image.
To begin with, this rule divides the image into nine equal parts – all squares. This provides you with four different focal points where the lines intersect each other. What you have here is an equally measured tic-tac-toe board etched on the photograph, with the focal points making the strongest visual points of the image.

Using the Rule of Thirds
Now when it comes to using gridlines, you can physically draw them on a photograph you have in hand but, that’s not where you need it. To get the picture composition right, you need to imagine these gridlines through the lens of your camera and adjust the composition accordingly in the viewfinder.
Once you have that figured out, the next step is to decide which focal points you need to use in order to make your image appear powerful. The idea is to place your subject along with one of the lines to shed greater visual emphasis on it.
However, when it comes to the gridlines, not all of them are as useful and as impactful as others. When deciding which of the gridlines would work best for your image, follow these simple pointers:
- When you have a single subject, it is best visualized on the left-hand line.
- However, there are cultures where people read information from right to left instead of left to right. In such cases, the right-hand line works best.
Things are however, different when you have multiple objects in an image. This is where you need to create a hierarchy of emphasis for the eyes to travel from one object to another without compromising the depth of the image.
- In a situation like this, place the object you want to appear the strongest (regardless of it being in the foreground or the background) on the focal point on the bottom right.
- All other objects should flow towards the top left point that has the weakest focal strength.
This simple rule can make your photographs different elements in all their glory that is even visible to the eyes of people looking at it.
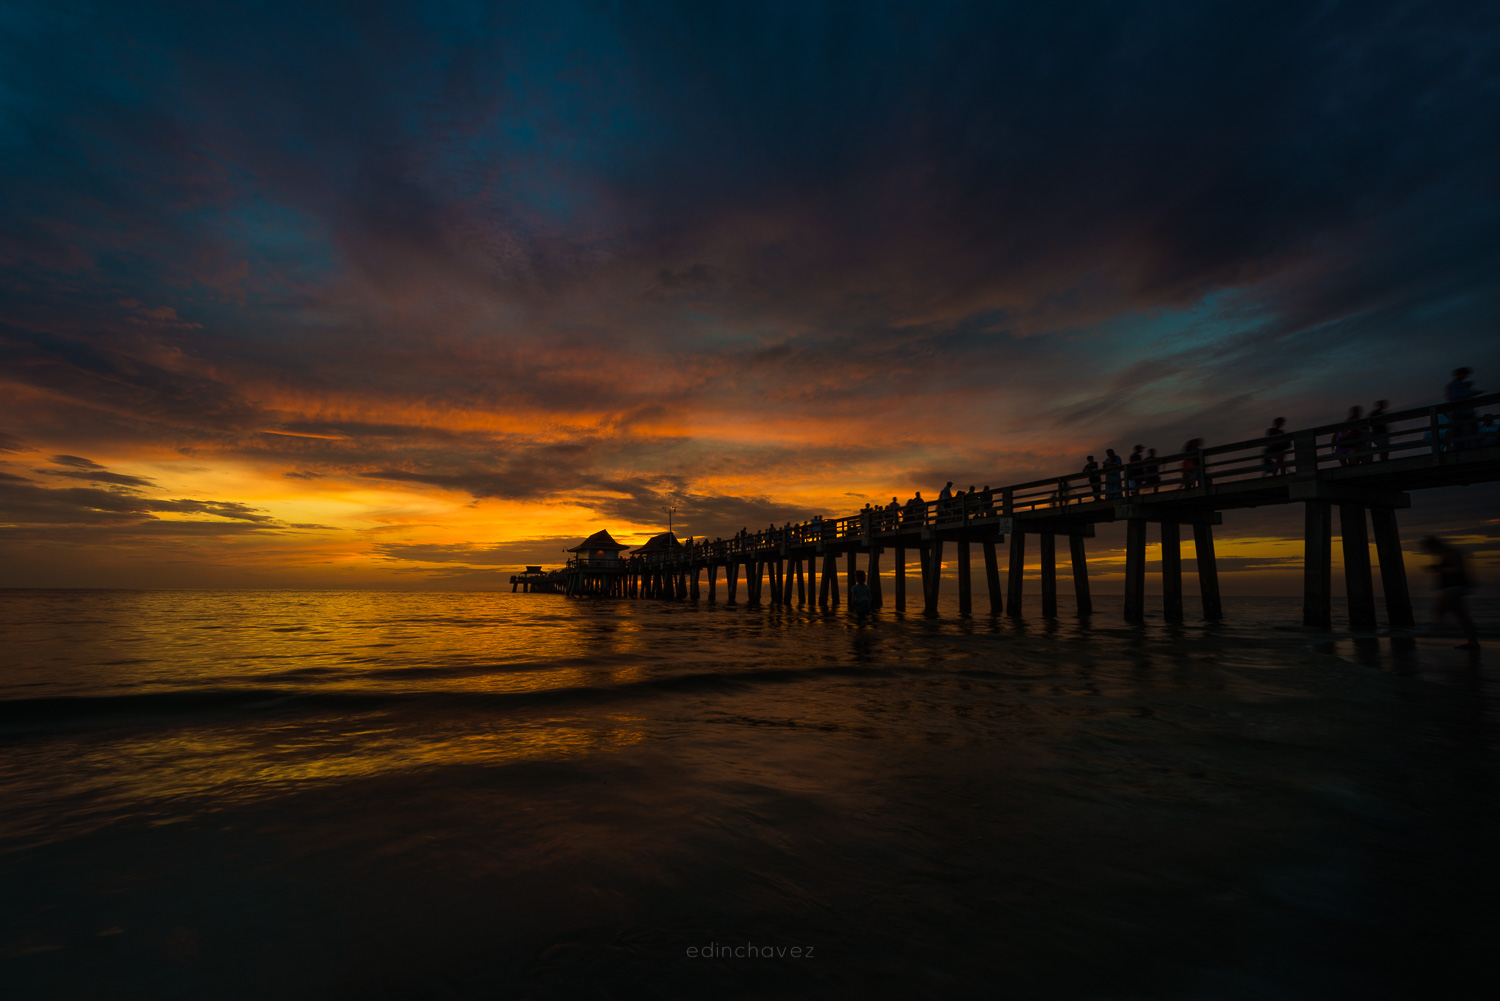
Another rule you need to keep in mind is that you need to photograph the subject in a way that it’s placed on the frame opposite to the side where the subject is looking towards.
Let’s say you’re photographing a lighthouse that is faced towards the right. The correct way to capture this lighthouse would be to place its body on the left side of the frame. This adds more detail and dimension to the photograph and your photograph doesn’t appear to be one of a lighthouse staring into blank space.
We really hope you find this article useful. Mastering the rule of thirds is an art. Once you have it, you can safely capture powerful images that are focused, detailed and pleasing to the eye.
Do you have any rule-of-thirds tips to share with us? Let us know what worked for you!


